A homeowner once looked at me—grout float in hand, tile walls halfway done—and asked:
“Do I really need to grout this… can’t I just leave it as is?”
I smiled. It’s a question I hear all the time.
As an interior designer, I’ve seen beautifully tiled spaces fall apart simply because the grout was rushed… or skipped. And I’ve also seen first-time DIYers pull off grout jobs that looked just as clean as a pro’s—because they followed the right steps.
In this guide, I’ll walk you through how to grout tile step-by-step, then help you choose the right grout type for your project, avoid common mistakes, and finish with a clean, pro-level look.
Table of Contents
How to Grout Tile (Step-by-Step)
Grouting tile is simple if you follow the right steps. Here’s how to do it:
- Clean the tile surface – Remove dust and debris so grout sticks properly.
- Mix the grout – Stir until thick and smooth (or use pre-mixed).
- Apply with a float – Spread grout diagonally across joints using a rubber float.
- Press firmly – Push grout deep into the joints for a strong hold.
- Wipe with a sponge – After 10–15 mins, gently clean the tiles with a damp sponge.
- Buff the haze – Once dry, polish with a microfiber cloth.
- Seal the grout – After 48–72 hours, apply grout sealer to protect the surface.

Types of Tile Grout (And What’s Best for Homeowners)
Sanded Grout

Best for:
- Floor tiles
- Tiles with wide joints (1/8″ to 1/2″)
What it is:
This grout is mixed with sand to make it strong and stable. It grips well in wider joints and resists cracking over time.
Why homeowners like it:
- Affordable and widely available
- Strong enough for high-traffic areas like kitchens and entryways
- Easy to find at stores like Home Depot
What to watch for:
Not suitable for delicate surfaces like polished stone or glass—it can scratch them.
Practical rating:
9/10 for floor projects
Recommended Product

- Package Dimensions: 4.75 in W x 4.75 in H
Weight: 2.25 pounds
UPC: 79436600583-9 - It’s so easy – just add water!
- Excellent workability
Unsanded Grout

Best for:
- Wall tiles
- Shower walls and backsplashes
- Narrow joints under 1/8″
What it is:
This is a smooth grout without any sand. It spreads easily, making it ideal for vertical applications.
Why homeowners like it:
- Doesn’t scratch soft or glossy tile
- Easier to use on walls
- Good for bathroom and shower walls
What to watch for:
Avoid it on wider joints—it tends to shrink or crack when spread too far.
Practical rating:
8/10 for wall and shower tile
Recommended Product

- Custom Building Product WDG5-4 Non-Sanded Tile Grout: This high-quality grout is specially designed for tile installatio…
- 5-Pound Bag for Generous Coverage: Each bag contains 5 pounds of non-sanded tile grout, providing ample material for cov…
- Smooth and Even Application: WDG5-4 grout ensures a seamless and consistent finish on your tiled surfaces, enhancing the…
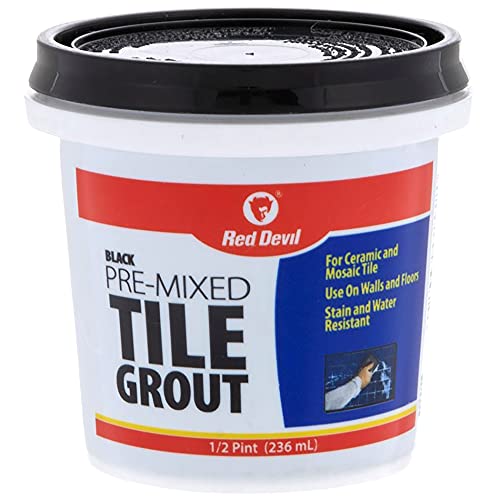
Pre-Mixed Grout (DIY-Friendly Favorite)

Best for:
- Small tiling projects
- Kitchen backsplashes
- Accent walls
What it is:
As the name suggests, this grout comes ready-to-use. No mixing, no mess.
Why homeowners love it:
- No mixing ratios to worry about
- Beginner-friendly (just open and apply)
- Saves time on small jobs
What to watch for:
It costs more per ounce, so it’s not great for big projects. Also, shelf life is short once opened.
Practical rating:
10/10 for small DIY jobs
Recommended Product
- PROFESSIONAL RESULTS WITH DIY EASE: Achieve expert-level tile grouting without the hassle – perfect for both new install…
- SUPERIOR DURABILITY: Offers long-lasting performance, maintaining the integrity of your ceramic and mosaic tile projects
- VERSATILE APPLICATION: Excellent adhesion to tile, masonry, wood, and wallboard – ideal for both wall and floor use
Epoxy Grout (Premium & Durable)

Best for:
- Bathrooms
- Wet zones (showers, laundry rooms)
- Backsplashes with frequent cooking stains
What it is:
This grout is made from resin and hardener, not cement. It’s non-porous, making it highly resistant to water, stains, and mildew.
Why homeowners upgrade to it:
- Waterproof and chemical-resistant
- No need for sealing
- Lasts longer than traditional grout
What to watch for:
It’s expensive, dries fast, and takes more skill to apply. It’s best for advanced DIYers or professionals.
Practical rating:
6/10 for beginners — 9/10 if professionally installed
Recommended Product

- 400ml Epoxy Grout, Easy to apply, no hurry and no mess. Advanced dual tube design, No need for a mixer to premix, just n…
- Color:White. Long lasting and don’t discolor, choose your favorite color to fill your tile grout line, our products are …
- Strong and durable, epoxy grout made from epoxy resins, it offers greater bond strength and more flexible allowing for t…
Urethane Grout (Stylish & Low Maintenance)

Best for:
- Decorative tiles (glass, mosaic, or metal)
- Statement bathrooms or feature walls
What it is:
A flexible, newer type of grout that doesn’t need sealing and resists staining.
Why it’s trending:
- Ready to use (some brands are pre-mixed)
- Doesn’t discolor like traditional grout
- Great for keeping decorative tiles clean and vibrant
What to watch for:
More expensive and needs special cleaners. Not ideal for beginners.
Practical rating:
7/10 for design-forward projects
Recommended Product

- Premixed sanded urethane grout; Easy to install for DIY or contractor use
- Delivers a unique reflective appearance; Offers limitless design possibilities
Prism Grout (Rapid-Setting)

Best for:
- Busy households
- High-traffic floors
- Projects with tight deadlines
What it is:
A newer performance grout that dries fast, resists shrinking, and keeps color consistent.
Why homeowners might choose it:
- Saves time during installation
- Less prone to uneven color or cracking
- Ideal for bathrooms and kitchen floors
What to watch for:
You need to work quickly—it sets fast. Not ideal if you’re tiling solo and slow.
Practical rating:
7/10 for experienced DIYers
9/10 for contractors
Recommended Product

- Handles better than traditional cement grout
- Clean immediately or within 30 minutes
- Easier clean-up than cement or epoxy
Quick Summary: What Should You Choose?
| Project Type | Best Grout Type | Most Practical For |
|---|---|---|
| Kitchen or hallway floor | Sanded Grout | Everyday home projects |
| Shower wall or backsplash | Unsanded Grout | Smooth, easy to apply |
| DIY backsplash | Pre-Mixed Grout | Fast and beginner-friendly |
| Luxury bathroom upgrade | Epoxy or Urethane | Long-term, waterproof use |
| Speedy renovation | Prism Grout | Tight deadlines |
Common Grouting Mistakes (And How to Avoid Them)

Most grout problems come from these small errors. Avoid them, and your work will last years.
- Over-wiping with water
Weakens the grout and can wash it out of joints. - Not packing joints fully
Air gaps lead to cracking and water intrusion. - Leaving haze too long
Dried haze is a pain to remove later. Buff early! - Skipping sealer
Grout is porous — protect it from water and stains. - Working too fast (or too slow)
Fast-setting grout needs speed. Take your time with regular grout, but don’t leave it sitting.
Pro Tips for a Clean Finish

These simple tips come straight from the jobsite and make a big difference:
- Tape off baseboards and edges for clean lines
- Work in 2×2 ft sections so grout doesn’t dry before wiping
- Use a flashlight at a low angle to spot missed haze- See our guide on How to Choose the Perfect Number of Recessed Lights.
- Keep two buckets: one for clean water, one for rinsing
- Buff gently with microfiber cloths after drying
Grout Tool Checklist
Here’s what you’ll need to get the job done right:
| Tool | Purpose |
|---|---|
| Rubber Float | Spread grout across joints |
| Mixing Bucket | Mix powdered grout evenly |
| Large Sponge | Clean tiles after grouting |
| Microfiber Cloth | Buff haze from tile surface |
| Painter’s Tape | Protect walls and cabinets |
| Grout Sealer | Shield grout from stains/moisture |
| Gloves | Keep your hands clean |
Need more gear? Check out our Top 5 Tools Every Homeowner Needs for DIY Home Repairs
Recommended Product


Grout Color Tips: How to Choose the Right Shade
Color isn’t just aesthetic — it sets the mood of your space.
- Match your tile
Makes the surface look seamless and clean. Great for spa bathrooms or minimalist kitchens. - Contrast your tile
Makes the tile pattern pop — works well for subway tile or geometric designs. - Go gray for flexibility
Hides dirt better than white and works with both light and dark tile.
When to Call a Pro
You don’t have to DIY everything. Call a professional if:
- You’re working with natural stone or soft tiles (easy to damage)
- The project covers a large floor area
- You’re using epoxy or fast-setting grout and don’t want to risk it
- The tiles are installed over heated flooring systems
Grouting might feel like the final chore, but it’s actually what locks your project in place — literally and visually.
If you pick the right grout, follow the correct steps, and take your time, your space will look polished for years to come.
Remember:
- Clean your tile before starting
- Use the right grout type for your space
- Always seal (especially in wet areas)
💡 Want to take all the guessing out of your project? Try our Tile Calculator to figure out how much tile you need, then use the Grout Calculator (coming soon!) to nail down your materials list.
Affiliate Disclosure: Some of the links in this post are affiliate links, including Amazon links. This means I may earn a small commission if you make a purchase through them — at no additional cost to you. I only recommend products I personally use or believe will be helpful to my readers.
Staff picks
-
A Guide to Selecting the Perfect Palette for Every Room: Practical Tips for Choosing Colours, Fabrics and Textures to Transform Your Home
Original price was: 29,00 $.14,00 $Current price is: 14,00 $. -
Digital Home Renovation Planner | Home Project Planner
Original price was: 49,00 $.19,00 $Current price is: 19,00 $.


Similar Articles

What’s Next in Style: 7 Interior Design Trends 2026

Choosing the Right Flooring for Your Home: Top Materials, Costs & Tips

5 Stylish Bathroom Upgrade Ideas for a More Relaxing Bathroom Time

Which Wallpaper Material Is Best? A Complete Guide to Styles, Costs & Durability
Problems with Epoxy Floors (and How to Fix Them)